Ceilings are often the most overlooked and forgotten part of painting the interior of your home. They are easy to miss for one reason or another (maybe because we’re not looking up a lot). However, your ceiling merits the same thought put into the design, color, and overall look that your home’s walls have been given.
As a matter of fact, painting your ceiling can lighten up the space and add a hint of warmth to your home (among other great reasons).
Painting a ceiling isn’t a pain in the neck, either. It is typically a project that can be easily and quickly done with the right tools and supplies.So, are you ready to paint your ceiling?
Let us help guide you on the best tips for painting ceilings.

Tips on Painting a Ceiling
Whether you are a DIYer or would rather have a professional residential interior painter come do it, here are some things we’d recommend when it comes to painting your ceiling…
Paint with the Right Equipment
The kind of supplies you will need in order to start painting is determined by how tall and wide your ceiling is.
For most ceiling painting, you can use a long-handled paint roller to get the job done.
In some homes, you may need a ladder to reach the ceiling for painting.
Before You Paint, Do Some Prep
One of the biggest tips for painting ceilings is taking time to prepare.
Set yourself up for success and plan ahead. The more preparation that’s done, the higher the likelihood is of having a well-painted ceiling.
Step 1: Make Space
Before you start painting your ceiling, make sure to move as much of your furniture from the room as you can. This will allow your painting experience to be much simpler and less chaotic. Open up the space to work as easy as you can.
If by chance you can’t totally remove your furniture from the room, just push it to the middle and cover everything with drop cloths.
Take down any chandeliers or other lighting fixtures, so you have nothing in your way. This can allow you to paint the whole ceiling without the stress of getting paint on a light or fan or something.
In the event that you can’t take out a fixture, make sure the light is taped and concealed before you get everything rolling.
Step 2: Put Down Drop Cloths & Clean The Ceiling
Painting can definitely be messy, especially when you paint above your head.
You can protect your floor and bigger pieces of furniture from paint by placing down drop cloths in your area of painting.
The more space you can cover, the better. If you run out of drop cloths, you can always end up using newspapers, tarps, old towels, or even old bed sheets.
Also, prep your ceiling surface and walls by making sure to thoroughly clean them. Make sure you rinse and completely dry your ceiling before you start painting. This will ensure that the paint adheres to the ceiling correctly.
Step 3: Tape the Tops of the Walls
Tape off the tops of the walls where your ceiling and your wall meet with each other. Use 2-inch painter’s tape to keep roller marks off the walls. Avoid using 1-inch tape, due to the tape not being wide enough to prevent the paint roller from touching the walls.
Time To Paint Your Ceiling
Okay, now comes the fun part.
Step 1: Prime the Ceiling
Use your long-handled roller and apply a coat of interior latex paint primer. Make sure not to skip this step. By using the primer, it will allow for a stain-resistant and only need one coat of paint.
When drying, follow the instructions left by the paint’s manufacturer.
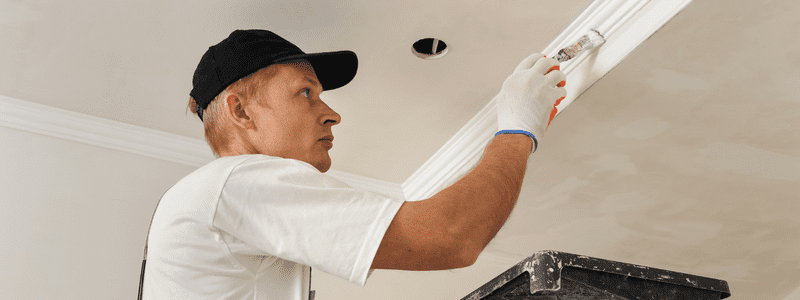
Step 2: Start By Painting The Borders First
Like painting a wall, you’ll need to begin by what we call “cutting in,” or utilizing smaller paint brushes to paint around the border of your ceiling. Give yourself a few inches of paint here, so that you’re less likely to touch any details or corners that you don’t want painted.
Use a brush to begin at the edge of the ceiling and paint into the ceiling a couple inches. You’ll need to feather the strokes so the edge will mix in consistently once you utilize a roller to paint the remainder of the roof.
To make “cutting in” simpler, ensure you’re using the proper ladder for your ceiling level. Trying to reach isn’t just hazardous, but can also bring about sore muscles (literally a pain in the neck) the following day. So, get comfortable on that ladder before you get to painting.
Empty some paint into a bucket to keep at the highest point of the stepping stool as opposed to bringing the whole can.
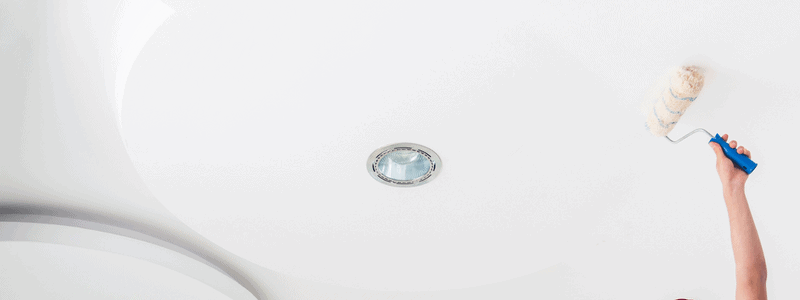
Step 3: Grab Your Roller and Start Painting
To begin, pour and mix your paint into your paint tray. Empty paint into the roller plate no higher than where the washboard section of your tray begins to incline away from the paint pool. This is to assist with trying not to submerge the roller into the paint. This keeps from too much paint being on the roller and causing drips.
Take your long-handled roller and begin from the edge of the ceiling and begin rolling closest to a window.
Begin painting away from one corner in as straight of a line as you can until the ceiling is totally shrouded in paint.
Each time you load your roller, start on an unpainted region of your ceiling and work your way back into a painted area. Try to paint your ceiling in one session. This will allow the paint to dry consistently.
Step 4: Apply a 2nd Coat
Wait for your first coat of paint to dry in order to determine if a second coat is needed.
Check the label instructions for dry times.
Step 5: Clean Up
Remove the tape while the paint is wet to keep from damaging any of your hard work when the paint dries. When removing drop cloths, wait for the paint to dry so you don’t spill or make a mess.
Leave It To the Pros!
When all is said and done, painting your ceiling can be an intimidating, messy, and time-consuming chore. While we can give tips on painting ceilings, or tips on just about anything, an expert painter from Colorado Painting will always leave the project looking as good and stress-free as possible.
So, the best tip if you aren’t up to the hassle, hire a professional residential interior painting company. A professional makes the job fast and great-looking.
At Colorado Commercial & Residential Painting, we offer expert advice, expert painting, and customer service with very competitive prices.
Contact us today for a free estimate on your next painting project.